Installing 1911 grips is a straightforward maintenance task that usually requires only a correctly fitting screwdriver and the grip panels designed for your pistol. The important steps are to verify that the firearm is unloaded, confirm grip compatibility, remove the existing panels without damaging the screw heads or bushings, and secure the replacement grips without overtightening the screws.
Most standard full-size 1911 pistols use two grip panels secured by screws threaded into frame-mounted bushings. However, grip dimensions and hardware can vary across compact models and manufacturer-specific configurations. Checking compatibility before installation helps prevent fitment problems.
WOOX's 1911 grip compatibility guide identifies its grips as designed for full-size 1911 pistols and compatible clones with standard grip screw bushings.
What You Need to Install 1911 Grips
Prepare the following items before starting:
- Compatible replacement 1911 grip panels
- A screwdriver or driver bit that fits the grip screws correctly
- The grip manufacturer's installation instructions
- A clean, stable work surface with enough light to inspect the frame and hardware
Use a driver that fully engages the screw head. A poorly fitting tool can slip, damage the screw slot, or mark the grip surface. Avoid using an improvised tool that does not fit securely.

Step 1: Verify That the 1911 Is Unloaded
Before handling the grip screws, point the pistol in a safe direction and follow the firearm manufacturer's unloading procedure. Remove the magazine, open the action, and visually and physically verify the chamber and magazine well are empty. Keep ammunition away from the work area.
Do not rely on the pistol's apparent condition or the absence of a magazine as proof that it is unloaded. Keep the action open while performing the work, and follow the manufacturer's safety instructions throughout the process.
Step 2: Confirm Grip Compatibility
Check the replacement grip panels against the exact pistol model and configuration. The 1911 name alone does not guarantee that every grip panel will fit.
Standard Government and Commander models generally use the same full-size grip dimensions. Officer and other compact variants can use shorter grip panels and different screw spacing. Some manufacturers also produce proprietary compact configurations.
Check these details before installation:
- Grip-frame size: Confirm that the panels are designed for the pistol's frame length.
- Screw spacing: Compare the mounting-hole positions with the existing panels.
- Grip bushings: Verify that the panels are designed for the pistol's existing screw and bushing arrangement.
- Safety and control clearances: Check that the grip profile clears the safety, magazine release, and other controls on your particular model.
WOOX specifies its 1911 grips for full-size pistols and compatible clones with standard grip screw bushings. Its product information distinguishes these from Officer and compact configurations, which may require different grips.
See the WOOX 1911 grip collection.
Step 3: Remove the Existing Grip Panels
Use the correctly fitting driver to loosen and remove the grip screws. Keep the screws together so they do not get lost, and support each panel as its final screw comes out.
Lift the panels away carefully. If a panel does not release easily, check for a remaining screw or another obstruction instead of forcing it off.
With the panels removed, inspect the exposed area for:
- Damaged or stripped screw heads
- Loose, damaged, or missing grip bushings
- Dirt or debris around the mounting points
- Cracks or other damage to the existing grip panels
Grip screws thread into the bushings, which are fitted into the frame. Do not assume that a loose or damaged bushing can be corrected by tightening the grip screw further. Stop if the hardware is damaged or the bushing turns in the frame, and consult a qualified gunsmith or the firearm manufacturer.
Step 4: Position the Replacement Grips
Place each replacement panel against its corresponding side of the frame. Align the screw holes with the grip bushings and check that the panel sits flat against the frame.
The panel should sit flat against the frame with its mounting holes aligned to the existing bushings. If it rocks or the holes do not align, check grip compatibility, panel orientation, and control clearance. Do not use the screws to pull a misaligned panel into place, as this can damage the mounting hardware or grip material.
Before inserting the screws, verify that the magazine release and safety controls have the clearance required by the pistol's design. An ambidextrous safety may require a compatible grip profile or cut-out, depending on the particular firearm and grip design.
Step 5: Reinstall the Grip Screws
Insert the screws through the grip panels and start each one carefully in its corresponding bushing. Begin threading by hand where possible so you can detect cross-threading before applying significant torque.
Once both screws are correctly engaged, tighten them evenly using the appropriate driver. WOOX lists a typical tightening range of 20–25 in-lb for its 1911 grips. Its product manual instructs users to tighten the screws by hand with an appropriate driver until snug and warns against overtightening. Follow the current instructions supplied with your specific grip, and do not assume that the same torque specification applies to every grip or firearm configuration.
Do not overtighten the screws. Excessive torque can damage the screw heads, threads, bushings, or grip material. It can also crack a grip panel, particularly if the panel is not seated correctly.
WOOX incorporates reinforced bushings into its 1911 grip designs to help resist cracking around the mounting points. That feature does not remove the need to use the correct hardware and tightening procedure.
Step 6: Inspect the Installation
Once the screws are secured, inspect both panels from several angles. Each panel should sit evenly against the frame, with no obvious gaps, rocking, or pinching.
Check that:
- Both grip panels are aligned correctly.
- The screws are seated and not visibly damaged.
- The panels do not move when handled gently.
- The magazine release and safety controls are not obstructed.
- No part of either panel interferes with the pistol's normal operation.
If a panel shifts, a screw will not engage correctly, or a control feels different after installation, stop and investigate the cause. Do not assume that additional tightening will resolve the problem.
Before returning the pistol to service, follow the firearm manufacturer's recommended post-maintenance inspection and function-check procedure. Keep the firearm unloaded during the inspection and do not use live ammunition to diagnose an installation problem. If the controls do not operate normally, seek assistance from a qualified gunsmith.

Walnut vs. Micarta: Does the Material Change Installation?
The basic installation process is similar for compatible walnut and Micarta grip panels. Fitment, screw alignment, hardware condition, and correct tightening remain the primary considerations.
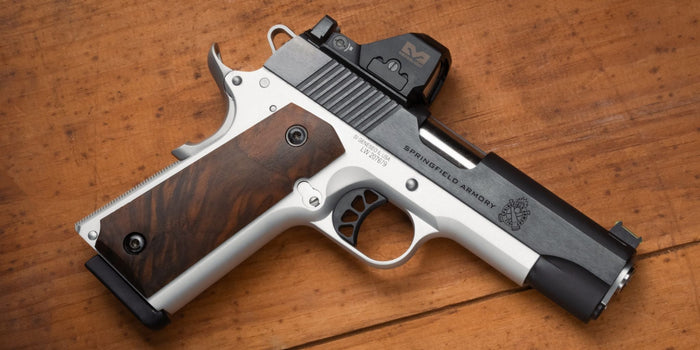
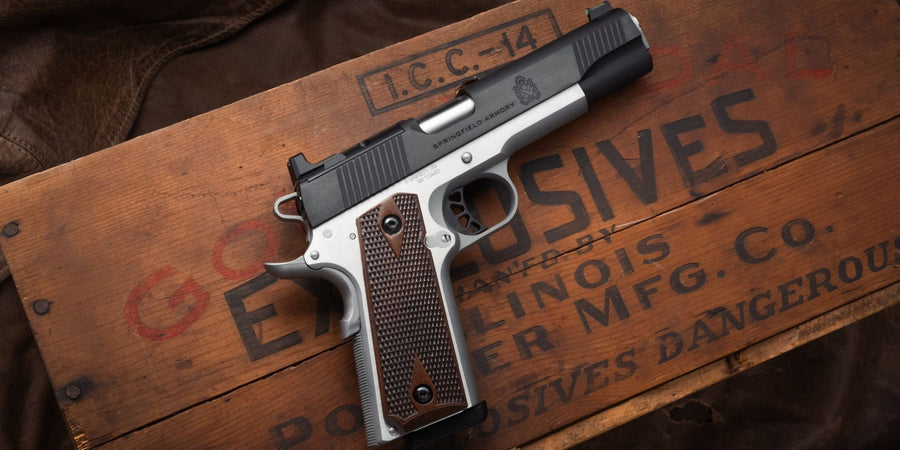
WOOX offers 1911 grips in hand-finished Claro Grade American Walnut and Micarta. The walnut grips have individual grain patterns, so each pair has its own appearance. WOOX describes its Micarta grips as weather-resistant and designed for durability.
The choice of material affects the grip's appearance and care requirements, but it does not remove the need to verify compatibility, align the screw holes, and follow the product's installation instructions.
How Long Does It Take to Install 1911 Grips?
For a compatible full-size 1911 with serviceable hardware, replacing the grip panels generally takes about five to ten minutes. The job may take longer if the screws are damaged, the bushings are loose, the panels do not align, or the pistol uses a nonstandard configuration.
Do not rush the installation to meet a time estimate. Confirming fit and inspecting the finished installation are more important than completing the task quickly.
The Practical Rule for Installing 1911 Grips
A successful 1911 grip installation depends on three things: compatible panels, undamaged mounting hardware, and correct screw tension. Verify the pistol's unloaded condition, align the panels without force, follow the manufacturer's torque guidance, and inspect the controls before returning the firearm to service.
For product-specific instructions, consult the WOOX 1911 Grips Installation Guide and confirm compatibility through the WOOX 1911 grip collection.
Frequently Asked Questions
Do I need a gunsmith to install 1911 grips?
Most standard replacement grip panels can be installed without a gunsmith when they are compatible with the pistol and the mounting hardware is in good condition. Seek professional assistance if the bushings are damaged, the screws will not engage correctly, or the panels interfere with the controls.
Can I reuse the original 1911 grip screws?
Often, yes. WOOX states that its 1911 grips use the existing screws on compatible pistols. However, inspect the screws and confirm that the replacement panels are designed for the existing hardware before reusing them.
How tight should 1911 grip screws be?
WOOX lists a typical tightening range of 20–25 in-lb for its 1911 grips. Its product manual instructs users to tighten the screws by hand with an appropriate driver until snug and warns against overtightening. Follow the current instructions supplied with your specific grip, and do not assume that the same torque specification applies to every grip or firearm configuration.
Do Government and Commander 1911 grips fit the same frame?
Standard Government and Commander 1911 models generally use the same full-size grip dimensions. Compact variants, including many Officer-pattern models, can use shorter panels and different mounting-hole spacing. Confirm the exact pistol and grip specifications before buying.
What should I do if the new grip panels do not sit flush?
Remove the panels and recheck their compatibility, hole alignment, and clearance around the controls. Inspect the screws and bushings for damage. Do not force the panels into place or tighten the screws to pull them against the frame. If the cause is unclear, contact the grip manufacturer or a qualified gunsmith.