How to perform a complete accuracy package on the Remington 700 Factory Rifle
- with Robert W Hart -

The Remington 700 is a renowned bolt-action rifle that has gained popularity among hunters, competitive shooters, and firearm enthusiasts. While the Remington 700 offers excellent out-of-the-box accuracy, some enthusiasts may seek to enhance its performance even further through a complete accuracy package. This article will guide you through the steps involved in performing a comprehensive accuracy package on a Remington 700 factory rifle, unlocking its full potential.
Bobby Hart
When it comes to long-range hunting, there is one prominent name that stands out: Bobby Hart. Renowned within the hunting community as the ultimate resource for enhancing your skills and acquiring top-notch gear for long-range hunting, Bobby Hart represents a legacy rooted in his family’s tradition of custom gun building and gunsmithing. As a fourth-generation custom rifle builder, he has assumed the lead role at Robert W Hart & Son, Inc. since 2001, following in the footsteps of his father, Wally Hart. Nestled in Nescopeck, Pennsylvania, this small, family-operated business has gained global recognition in the hunting, shooting, military, and law enforcement industries

Fore more info contact: Robert W Hart & Son, Inc.
401 Montgomery St.
Nescopeck, PA 18635
570-752-3655
Upgrading the factory Remington 700
USED IN THIS PROJECT:
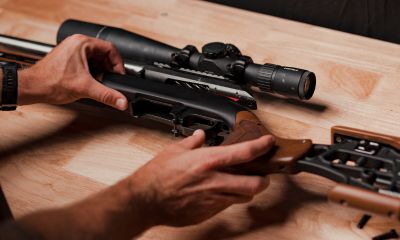
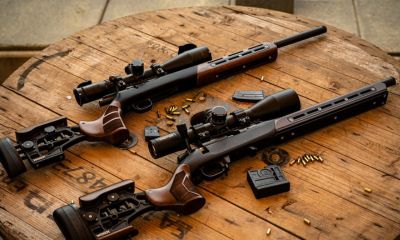
FURIOSA CHASSIS
EXPLORE
Upgrading a factory Remington 700 action requires a series of steps to ensure its accuracy and performance. Here's a breakdown of the recommended action upgrade process:
1. Truing and Blueprinting the Action:
The first step is to true and blueprint the action. This involves carefully aligning the action's receiver face, bolt lugs, and threads to ensure perfect alignment and eliminate any inconsistencies. Truing the action helps enhance accuracy by reducing potential sources of misalignment.
2. Recutting Lug Seats:
Recutting the lug seats involves machining the receiver and barrel lug seats to provide a precise and square mating surface for optimal contact. This step ensures a solid and consistent lock-up between the action and the barrel, resulting in improved accuracy and consistency.
3. Facing the Bolt:
Facing the bolt is essential to ensure proper alignment and fit. This process involves machining the front of the bolt to create a flat and perpendicular surface, ensuring a precise contact point with the barrel's chamber. This step helps to eliminate any potential misalignment during the locking process.
4. Surface Grinding the Recoil Lug:
The recoil lug, located between the action and the stock, plays a crucial role in maintaining consistent bedding and recoil control. Surface grinding the recoil lug involves carefully machining it to ensure a flat and true surface, allowing for optimal contact with the stock. This improves consistency and stability during recoil, positively impacting accuracy.
5.Lapping Bolt Lugs:
Lapping the bolt lugs involves using a lapping compound to remove any imperfections or inconsistencies on the surfaces of the bolt lugs. This process ensures a perfect and even contact between the bolt lugs and the action, maximizing surface area and improving accuracy.
6. Polishing the Bolt Face:
Polishing the bolt face helps ensure smooth and consistent operation. By removing any roughness or burrs on the bolt face, you reduce the chances of primer deformation or inconsistent ignition. A polished bolt face contributes to reliable and consistent firing, ultimately enhancing accuracy.
7. Truing Bolt Head Diameter and Adding Radius:
Truing the bolt head diameter involves precisely machining the bolt head to ensure it is concentric with the bolt body. This step promotes consistent alignment and reduces potential eccentricity. Additionally, adding a radius to the bolt front helps facilitate smoother bolt cycling and minimizes the chance of binding.
8. Buffing Cocking Cam:
The cocking cam is responsible for engaging the sear and cocking the firing pin. Buffing the cocking cam involves smoothing out any rough edges or surfaces on the cam to ensure a clean and consistent engagement with the sear. This process helps maintain a smooth and predictable trigger pull, contributing to enhanced accuracy.

Installing the custom barrel
To install a custom rifle barrel, the following steps are typically involved:
Thread Barrel:
The barrel needs to be threaded to allow it to be properly installed and secured onto the rifle's action. This involves cutting threads on the barrel's exterior so that it can be screwed into the receiver.
Fit and Chamber Barrel:
The custom barrel must be precisely fitted to the action. This includes ensuring the barrel aligns correctly with the action and providing a proper fit. Once fitted, the chamber is cut to the desired specifications for the caliber being used.
Chamber to Desired Caliber:
The chamber is cut into the barrel to accommodate the specific cartridge or caliber that the rifle is intended for. This step is critical to ensure proper cartridge alignment and functioning.
Target Crown on Muzzle:
The muzzle, or the end of the barrel, is carefully machined to create a target crown. The target crown helps protect the bore from damage and improves the rifle's accuracy by ensuring consistent gas release as the bullet exits the barrel.
Custom Muzzle Brake Installation:
If desired, a custom muzzle brake can be installed on the barrel. A muzzle brake helps reduce recoil and muzzle rise, enhancing shooter comfort and aiding in maintaining target acquisition. The brake is carefully fitted and blended into the barrel for a seamless appearance.
Bead Blast Barrel with Snakeskin Finish:
To achieve a snakeskin finish, the barrel can be bead blasted, which creates a textured surface. This finish not only adds an aesthetic touch but can also provide a better grip and resistance to glare.

Final steps & the field test
To complete the rifle customization, the final steps involve adjusting the trigger and installing the Athlon scope:
Adjust the Trigger:
Fine-tune the trigger to achieve a crisp and consistent pull while eliminating any creep or excessive movement. This step enhances trigger control and accuracy.
Install Athlon Scope:
Use Talley Rings designed for Remington 700 rifles (30mm scope rings, medium height) to securely mount the Athlon scope. Lapping the rings ensures proper alignment, while bore sighting aligns the scope's reticle with the rifle's bore axis.
The rifle was then taken to the field for a thorough test, engaging targets at various distances up to 700 yards.
Custom Turret:
During the field test, a custom turret was created based on collected ballistic data.This turret allowed for precise adjustments for different yardages, facilitating accurate long-range shooting with the Remington 700.

Through a complete accuracy package, including action tuning, barrel optimization, trigger adjustments, and scope installation, the Remington 700 factory rifle can be significantly improved in accuracy. The field test and custom turret marking further validated the rifle's enhanced performance, providing accurate adjustments for engaging targets at extended distances.
SHOP BY purpose
Discover the perfect fit for your needs with our diverse collection of aftermarket stocks, tailored for a range of different purposes.
see all our stocks


